
To see if this custom-fit item will work for you please tell us what vehicle you'll use it with.
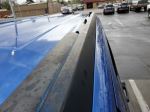
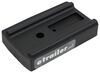
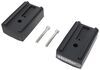
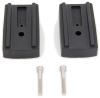
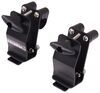
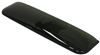
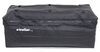
These 10-mm thick Quick Mount spacers bolt to the tops of 2 legs to level a crossbar on your vehicle's roof. Sold as a pair.
Features:
To attach the Quick Mount spacer between your roof rack leg and crossbar, you will use the nut, flat washer, and spring washer originally included with the leg hardware. You will replace the leg's original socket head cap screw with the new screw included with the spacer kit.

Videos are provided as a guide only. Refer to manufacturer installation instructions and specs for complete information.
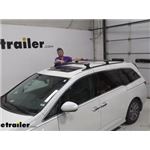
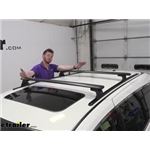
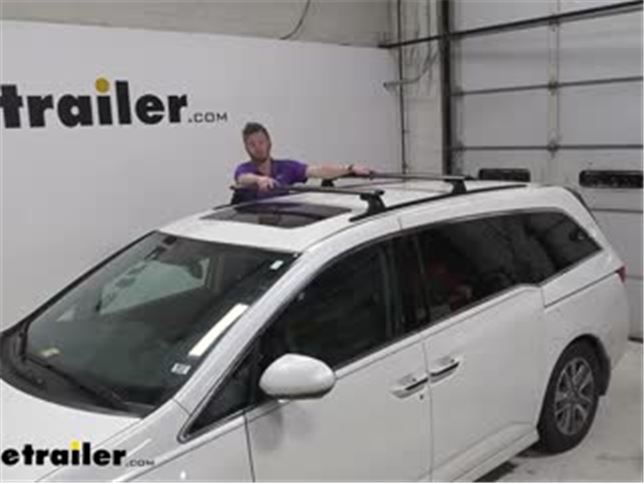
Today we have a 2016 Honda Odyssey and we're gonna be taking a look at the rhino rack RT style roof rack track aero bar system. There are two different types of roof rack systems you can put on a naked roof. Typically, what you see is with normal vehicles unlike vans is we have these little clamps that go in the door jams, but since we have this it's preventing us from doing that. So that's why the tracks are gonna be in that fit guide, whenever you put that vehicle in. I really like the track system, just because it gives you the ability to slide these around when it comes to the other style clamp naked roof sets that you may be seeing, we're kind of limited to where we need to put them. Half the time in the instructions it tells you to put it in a specific spot and you're kind of limited there.
With this we have 66 inches of track so we can slide these around to accommodate all of our accessories. If you're deciding between the two different types of naked roof kits, this is the best in my opinion because naked roof styles with the clamps take so long to take off. With this you just need a key, I just need to pull these in, push 'em forward and look at that. We can take this off in a matter of seconds which is gonna be really nice if you don't really like to have the bars up there and we can either keep these in here, loosen 'em, slide 'em out, or I'd rather just put that little cap on there so it's ready to rip for next time. And it's just as easy to put it back into place.
In my opinion, after messing with this thing for a while this thing is absolutely amazing 'cause I just wanna get to the bike trail. I just wanna get to the water, blah, blah. Look at that done. As you can see we can both take our whole entire sunroof completely back. We can also tilt it without hitting our bar.
And that's because we have a significant amount of space between our roof and the bottom of our bar. I'd say it's a solid three and a half inches from the roof to the bottom of the bar, which is kind of a lot. We actually still have a decent amount of room right here. So if this thing is completely up, we have about two inches and that's gonna clear most clamp style accessories. With our Honda Odyssey we have a little bit different spread from the front compared to the back and you can kind of see what I'm talking about because on the front we're literally right over top of the sunroof and we only have close to two inches of overhang on both sides but moving to the back, it's a little bit closer.
The tracks are a little closer to each other. So from the end cap it's about two and three quarters of an inch. Aero bars are great because it's a pretty standard size. So all of your clamp around accessories are gonna work with it. But cool thing about this is we have a little slot right here. So for T track accessories a lot of the times with T tracks, well one it's nice 'cause it's not as bulky underneath, it looks a little bit more clean, but it is gonna keep some of that height down with some of your other accessories. So with the aero bars, you are gonna get two different options when it comes to that. So that really leaves all your options open, which I like. But one thing you do wanna do whenever we find a place for your accessory to sit we're gonna cut that little section out and then fill the rest in just to keep the wind noise to a minimum. For your clamp around accessories, if those have locking capabilities definitely get those just because someone could take it off if it didn't have a lock on it. But if you do use the T slots, nice thing about it is look at the shape. That is very unique. If you don't have this key, I've tried to get it unlocked and it's very very hard and you end up just destroying this cap. So definitely keep this special key. So that's gonna help us lock all of our T slot accessories to the roof. I really like that 'cause you don't really need to get a locking accessory if you are using the T slots because you're gonna need this special tool to get to it. It also does come with locking cores, some roof rack systems don't come with locking cores. This one does so you don't have to shop for more stuff. And I really like that. You can, if you do have some other type of rhino rack accessories, this is a 001 locking core but we can match those all up together just so we don't have to have a bunch of different keys. With this specific kit it does come with a larger capacity than some of the other standard clamp on style naked roof racks but always check your vehicle's owner manual 'cause typically the roofs can't really handle near as much weight as the roof rack system. So that's the case for here. We can load this thing up completely and we're not gonna overload the bars but we might overload our roof. So definitely either call your manufacturer or look in that owner's manual to find that number so we're not stressing out our car too much. This isn't your typical install, but once you get it all set up, it is the best option in my opinion, for our '16 Honda Odyssey. So if you're a little nervous about the install just watch Adam and I'll take care of you. And you'll be very, very confident after you watch the install portion of this video. So you can do it at home by yourself. First thing you wanna do is get some tape. And before you put the tape down you wanna clean off the surface so tape sticks and then I did two layers just to kind of give me an idea of exactly where I want, 'cause you wanna protect the roof from anything. And then once that's done we're gonna take some measurements. These measurements will vary from vehicle to vehicle but what I'm doing on our '16 Honda Odyssey, there is a little trim piece here and there's a little line right in there. So I'm using that line as a reference and goal here is to get the even amount of spacing from this point here to our track. And then we're gonna go on the back and I'm using the little hatch crack right here. You get about 17 inches. So there's 17 right here and then 17 from our front measurement as well. Once we get that done, grab a little Sharpie or a marker and mark these lines at that mark on each side. And then it does help if you have an extra set of hands because as you can see our roof is a little curved and our bar is not. So what I did was I grabbed a friend and I lined up one, pushed this side down and then you take that same exact Sharpie marker and you mark all these holes. So as you can see on our tape we have our line, hole, hole, hole, hole holes line. So we do wanna make sure that it's gonna be nice and even as well. So I'm using the gutter right here as a reference to make sure that the distance between the gutter and the center of the hole is the same throughout the whole entire thing. I like this just because it's going to kind of curve to our gutters and it'll look really good. Now we're gonna need a 5 millimeter bit and we do want to set the stop. So I'm using tape just because I don't have these in my garage. So you probably won't either. But using this tape here, we want about five to seven millimeters of bit sticking out. 'Cause we don't wanna go all the way through the headliner. So typically with drilling this stuff out, you want to be nice and slow and steady, one just to make sure that bit's not gonna get all dull, but especially in this case, we don't want to go through too quick and punch through our liner. So, medium amount of pressure. And we don't wanna be sitting here ripping like that. So you just wanna sit there, do it nice and easy and just take your time, patience is a virtue. And mom always told me that. And we could do the same thing for all of our other holes. Trust me when I say these metal shards don't feel good when they hit your skin. So let's suck 'em on up. Well now we can take our masking tape off, not really doing a great job but so what I'm doing is to just take a little bit of clear and putting it on like a little rag ear, ear little cleaner is gonna be the best for this. We just wanna go and hit the inside of that metal to coat it. And then once we put this on all the holes we'll just give it like 15 minutes to dry. Now it's time for the butyl tape. Just wanna take one side, pull it off and line it up with a hole the best you can. Just like that. And then we can do that for all the holes. And then we will peel this top layer off. If you've got fingernails, great. If you don't, find some fingernails. This is kind of hard to peel this off. There we go. Now that we have our bar up, we just wanna put our end caps on, get our rivets ready and then get some air to our rivet gun. I do not have a rivet gun in my arsenal in my garage. So if you don't, just go to the hardware store and pick one up and you don't really need a really fancy one you just need one that's gonna work. 'Cause it is a necessary part to this install. We do wanna start with the front and work our way back. We have this little spacer that comes with the rivets in the kit and we wanna make sure it's nice and seated in there. If not, just take a little hammer and just tap, tap, tap, tap. Not too much. We just wanna make sure it's in there. And depending on the rivet gun that you're using there might be a little bit of scratches on the rails but they do give you that spacer. Grab this, and here's the spacer, we're gonna use this spacer for other remaining holes. Once you have it done on one side you do the same exact thing on the other side, the kit is gonna come with some towers. We have four total, two down here, but we already installed the ones on the back before the front since we have a little curve in our roof we are also going to get a spacer kit. So we are gonna be installing that. And of course we have another bar. Now we're gonna go ahead and start with the bottom section of our kit. This is what it's gonna look like when we're done. I have found it easier to put these on first. So what you wanna do is we're gonna take the flat washer and place that in, flat washer, follow it with the lock washer. Make sure they're seated down. We're gonna take our two with a bolt and notice how they have a special little tool and a special little indention, that's just gonna prevent people from running off with it. It is a lot easier to put these on right now. We don't need to tighten them down, we just need to thread them on a little bit, kind of like this. And trust me, this is easier to do before we install. Couple twists on both of them. And one thing we can do after this, if you wanted to, I did, it was a little easier, get this little rubber piece you can just fit that right there. And that's all you need to do for these. We don't have to remove this cap or anything, it's slotted so we can just slide 'er on in. I like to kind of keep my finger on the bolt, and the bolts with the little spacers are only gonna go on one way. And the kit does recommend anywhere from 24 to 27 and a half inches of spread. And that's just from the center to the center of our back bar. Now that that's in place, we can take our tool and tighten it down. We're gonna have one extra step when we're putting the spacers on, first, we want to take this cap off because it's blocking what we need to get to. Take your key, unlock that, and that's what we we're seeing underneath. And now we have a little bolt, so we can take that same exact tool we just used. We're actually going to completely remove this little top section. And also the bolt. But when we do do take this out we do wanna look at the washer and lock washer, and we're going to transfer that to the bigger one. And that's just going to compensate for the difference in space 'cause of our spacer. Now that that's done, plop that back in there, we can put our block on as you can see it fits nice and snug, you'll know if it's in the right position. And we can put this plate back on there but not all the way. Let's remove our end caps. Slide those to the side for now, flip the bar over and we are gonna take this. I wanna make sure that the red tabs are gonna be facing out. And this is only gonna go in like this in that little slot. Perfect. So what I like to do 'cause we really don't wanna completely set these. We wanna be able to move them a little bit. It's really hard to line it up perfectly, so I'm just tightening it ever so slightly. To where it really doesn't wanna move that much, but I can still move it with a little bit of force. So that's what we're going for. Do the same thing on this side. Since the aero bar from Rhino Rack is perfectly symmetrical we don't have to worry about which side goes forward. So what we wanna do is start on one side, kind of get it into place and you kind of notice how I'm a little far off. So that's why I kind of keep these nice and loose, slide this one out, start to get it lined up. We can adjust this once we kind of get it set into place. Well, one thing quick, little tip. What we can do is you can take these little tabs in, you push 'em in and push 'em towards the inside of the rail like that. So by doing that, I'm gonna do it on the other side, we can actually get it to sit in there perfectly, kind of like that. That's a quick tip for you. I do really like how they designed this and how it just sits in there so nicely. And once it's in there, you can kind of pull these out, might have to force it down a little bit and it'll click into place and we'll do that same thing on the other side. Now for the caps, put it in like this, make sure it's flush, twist it, pull that key, think it's good to go. Same with our cap for our cross bar. There we go. And that pretty much does it for our look at the Rhino Rack RT style roof rack track aero bar system..
Average Customer Rating: 4.5 out of 5 stars (4 Customer Reviews)
These 10-mm thick Quick Mount spacers bolt to the tops of 2 legs to level a crossbar on your vehicle's roof. Sold as a pair.I had to purchase these because the latch on the RetraxPro XR would not clear the bottom of the crossbars. Should have been included with either the tonneau cover or the crossbars.
It does the job and it wasn’t too pricey. It is what I needed so I give it a 5-star.

I don't use it as often as I would like but after a year it is still attached and works as intended. The rubber strips to reduce noise came partially loose, but with some fiddling they seem to be hanging in there now. For my vehicle at least, I used a professional (local auto shop) to install as I was not going to take a drill to my car.
Do you have a question about this Accessories and Part?
Info for this part was:
At etrailer.com we provide the best information available about the products we sell. We take the quality of our information seriously so that you can get the right part the first time. Let us know if anything is missing or if you have any questions.


Thank you! Your comment has been submitted successfully. You should be able to view your question/comment here within a few days.
Error submitting comment. Please try again momentarily.